Using PencilKit in iOS 13
WWDC 2019 introduced another interesting framework, PencilKit. It’s now available on iOS 13. PencilKit allows an easy integration of the drawing canvas view and toolkit in applications.
The goal of this article is to walkthrough PencilKit with different types of implementations. Namely, an integration in an iOS app to perform basic actions, using it alongside Core ML, and with MapKit.
Let’s get started.
Note: PencilKit requires Xcode 11 and iOS 13.
PencilKit: Inside the Wood
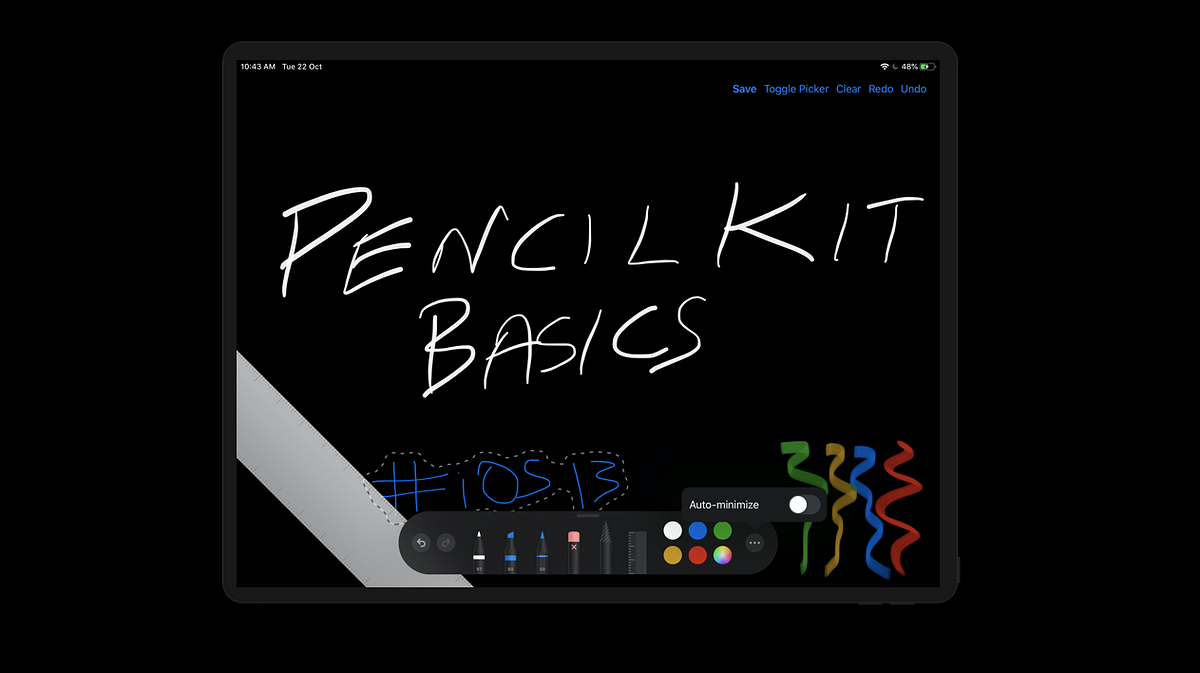
PKCanvasViewis the region inside where the drawing is possible. The user can draw all their art and doodles here.PKCanvasViewallows panning and zooming since it’s essentially a part of theUIScrollView.PKDrawingis the data model responsible for storing all the drawings.
PKCanvasViewhas adrawingproperty that’s used to get and set the data model.PKToolPickeris the floating UI that consists of all the brushes, color palettes, and helper tools for the drawing.-
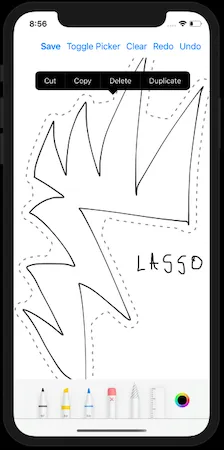
PKToolsholds the different kinds of brushes — which are essentially subclasses:PKEraserTool: This requires specifying either vector or bitmap as the type. Accordingly, the vector objects or pixels can be erased from the screen.PKInkingTool: These includepen,marker, andpencilfor different kinds of sketchesPKLassoToolis a selection tool for selecting a drawing area. It pops up a context menu that allows copy/paste and duplicating the selected drawing.
Here’s a look at the lasso tool in action on an iOS device.
The ToolPicker is a floating panel on regular-size classes (iPad devices), but it’s fixed to the bottom of the screen in the compact-size classes.
Also, the undo/redo and minimize buttons are not available in the compact version of ToolPicker.
The ToolPicker palette has a responder-based visibility. That means that it’s visible when the PKCanvasView is the firstResponder and can be hidden by resigning PKCanvasView from the first responder.
To enable/disable finger drawing with PencilKit, we can toggle the Boolean property allowsFingerDrawing on the PKCanvasView.
Enough talk. Let’s build our iOS application using PencilKit now.
Implementation
We’ll be implementing the following things in our iOS application.
- Adding undo/redo draw actions for iOS devices
- Saving drawing sketches to the photos library
Set Privacy — Photo Library Additions Usage Description to Allowed in Info.plist in order to save images.
Our Storyboard
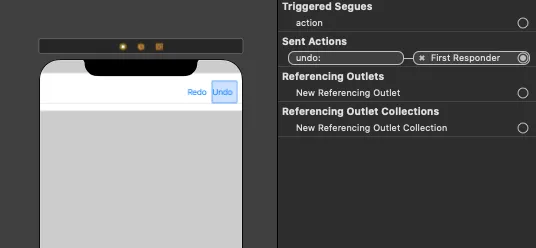
For the undo and redo actions, we’ve used the built-in selectors.
Setting the CanvasView
The following code sets the CanvasView for you:
let canvasView = PKCanvasView(frame: .zero) canvasView.translatesAutoresizingMaskIntoConstraints = false
view.addSubview(canvasView)
NSLayoutConstraint.activate([ canvasView.topAnchor.constraint(equalTo: navigationBar.bottomAnchor), canvasView.bottomAnchor.constraint(equalTo: view.bottomAnchor), canvasView.leadingAnchor.constraint(equalTo: view.leadingAnchor), canvasView.trailingAnchor.constraint(equalTo: view.trailingAnchor), ])
Setting the ToolPicker
- The initialization is done by asking for the shared ToolPicker for the window
- Canvas View needs to be added as an observer to the ToolPicker
setVisibletrue indicates that whenever the Canvas View becomes the first responder, the palette will show up
guard let window = view.window, let toolPicker = PKToolPicker.shared(for: window) else { return }

toolPicker.setVisible(true, forFirstResponder: canvasView) toolPicker.addObserver(canvasView)
canvasView.becomeFirstResponder()
Clear the Canvas View
In order to clear the PKCanvasView, just reinitialize the PKDrawing instance.
canvasView.drawing = PKDrawing()
Saving drawing to UIImage
func image(from rect: CGRect, scale: CGFloat) is invoked on the PKDrawing instance.
It returns a UIImage of the portion of the drawing, we want to capture.
The scale is typically set to 1.0. Set higher values for a more detailed image (useful for retina display).
let image = canvasView.drawing.image(from: canvasView.drawing.bounds, scale: 1.0)

UIImageWriteToSavedPhotosAlbum(image, self, nil, nil)
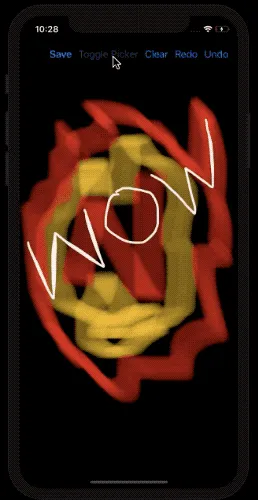
Here’s the full source code of our PencilKit iOS 13 application:
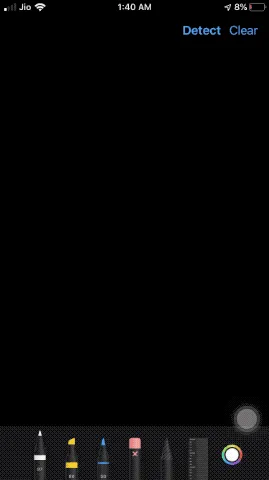
Here’s an output of the PencilKit application in action on an iPhone device:
That sums up this introductory section on PencilKit in iOS 13. You can download the above source code from my Github repository.
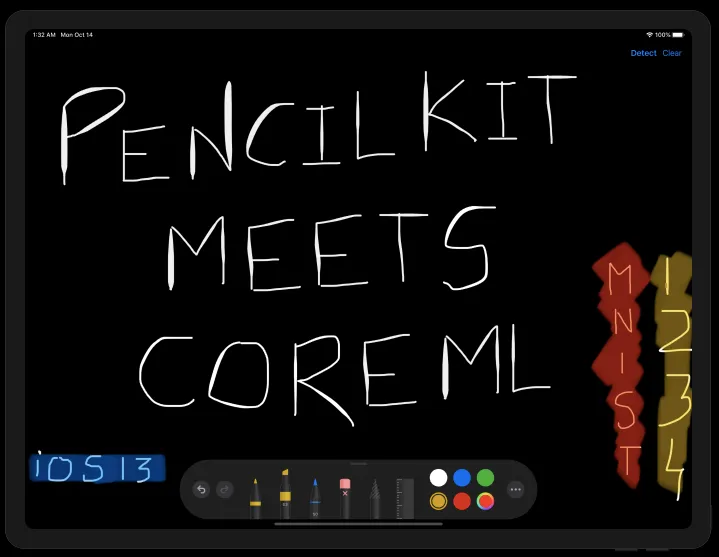
PencilKit Meets Core ML
It’s time to onboard Core ML into the drawing arena. The goal of this section is to run Handwritten Digit Classification using the famous MNIST Model on our PencilKit drawings.
MNSIT: A Quick Word
The MNIST dataset is an image dataset consisting of around 60,000 images of handwritten digits with dimensions 28 x 28 in grayscale.
The images are of the size 20 x 20 and are normalized to fit in the center of the box. The accuracy works best when the digits are centered in the input image.
We won’t be digging deep into the model layers and training the dataset in this article. Let’s assume we were gifted a ready-made Core ML MNSIT Model.
Final Output
An image is worth a thousand words. A GIF is composed of thousands of images. Here’s the final outcome you’ll get by the end of this piece.
Setting Up Our App
Before Core ML asks out the PencilKit framework on a date, let’s get our PencilKit framework dressed.
Setting up the canvas
It’s really easy to set up the PKCanvasView in our application, as the following code shows:
let canvasView = PKCanvasView(frame: .zero)
canvasView.backgroundColor = .black
canvasView.translatesAutoresizingMaskIntoConstraints = false
view.addSubview(canvasView)
NSLayoutConstraint.activate([
   canvasView.topAnchor.constraint(equalTo: navigationBar.bottomAnchor),
   canvasView.bottomAnchor.constraint(equalTo: view.bottomAnchor),
   canvasView.leadingAnchor.constraint(equalTo: view.leadingAnchor),
   canvasView.trailingAnchor.constraint(equalTo: view.trailingAnchor),
])
Setting our tool picker
The ToolPicker is responsible for displaying the various brushes in our application. It provides ink, pencil, selection, eraser tools along with an option to undo and redo(this is available on iPadOS only owing to the size of the screen).
The following code shows how to set up the ToolPicker UI in our application:
override func viewDidAppear(_ animated: Bool) {
    super.viewDidAppear(animated)
guard
     let window = view.window,
     let toolPicker = PKToolPicker.shared(for: window) else {return}
toolPicker.setVisible(true, forFirstResponder: canvasView)
    toolPicker.addObserver(canvasView)
    canvasView.becomeFirstResponder()
}
Setting our navigation bar buttons
The navigation bar was already added to the storyboard. In the following code, we’ve added a few action buttons to it.
func setNavigationBar() {
        if let navItem = navigationBar.topItem{

            let detectItem = UIBarButtonItem(title: "Detect", style: .done, target: self, action: #selector(detectImage))
            let clearItem = UIBarButtonItem(title: "Clear", style: .plain, target: self, action: #selector(clear))
navItem.rightBarButtonItems = [clearItem,detectItem]
            navItem.leftBarButtonItem = UIBarButtonItem(title: "", style: .plain, target: self, action: nil)

        }
}
The left bar button is where the final predicted output is displayed.
Preprocessing the Drawing Input
In order to feed the PencilKit drawings to the CoreML framework. We first need to extract the image from the canvas. Let’s see how’s that done.
- Converting the
PKDrawinginstance into aUIImageis straightforward. The real challenge is in preprocessing it for the Core ML Model. - The UIImage we get from the PKDrawing contains just the drawn image with no padding.
- We need to create an image with the size of the view and overlay the
UIImagefrom thePKDrawingin the center of it. Basically a UIImage within a UIImage.
The following code does that for you:
func preprocessImage() -> UIImage{
        var image = canvasView.drawing.image(from: canvasView.drawing.bounds, scale: 10.0)
        if let newImage = UIImage(color: .black, size: CGSize(width: view.frame.width, height: view.frame.height)){
if let overlayedImage = newImage.image(byDrawingImage: image, inRect: CGRect(x: view.center.x, y: view.center.y, width: view.frame.width, height: view.frame.height)){
                image = overlayedImage
            }
        }
}
The following helper extensions functions were used in the above code:
extension UIImage {

    public convenience init?(color: UIColor, size: CGSize = CGSize(width: 1, height: 1)) {
        let rect = CGRect(origin: .zero, size: size)
        UIGraphicsBeginImageContextWithOptions(rect.size, false, 0.0)
        color.setFill()
        UIRectFill(rect)
        let image = UIGraphicsGetImageFromCurrentImageContext()
        UIGraphicsEndImageContext()

		guard let cgImage = image?.cgImage else { return nil }
		        self.init(cgImage: cgImage)
    }

func image(byDrawingImage image: UIImage, inRect rect: CGRect) -> UIImage! {
        UIGraphicsBeginImageContext(size)

draw(in: CGRect(x: 0, y: 0, width: size.width, height: size.height))
        image.draw(in: rect)
        let result = UIGraphicsGetImageFromCurrentImageContext()
        UIGraphicsEndImageContext()
        return result
    }
}

extension CGRect {
    var center: CGPoint { return CGPoint(x: midX, y: midY) }
}
Prediction Using Core ML
Now that the image is input-ready, we need to do the following three things:
- Resize it to the input size 28 x 28.
- Convert it into a
CVPixelBufferin the grayscale color space. - Feed it to the Core ML Model.
private let trainedImageSize = CGSize(width: 28, height: 28)

func predictImage(image: UIImage){
        if let resizedImage = image.resize(newSize: trainedImageSize), let pixelBuffer = resizedImage.toCVPixelBuffer(){

guard let result = try? MNIST().prediction(image: pixelBuffer) else {
            return
        }
            navigationBar.topItem?.leftBarButtonItem?.title = "Predicted: \\(result.classLabel)"
            print("result is \\(result.classLabel)")
        }
}
The following extension functions were used for the above code:
extension UIImage{
func resize(newSize: CGSize) -> UIImage? {
        UIGraphicsBeginImageContextWithOptions(newSize, false, 0.0)
        self.draw(in: CGRect(x: 0, y: 0, width: newSize.width, height: newSize.height))
        let newImage = UIGraphicsGetImageFromCurrentImageContext()
        UIGraphicsEndImageContext()
        return newImage
    }


    func toCVPixelBuffer() -> CVPixelBuffer? {
       var pixelBuffer: CVPixelBuffer? = nil

let attr = \[kCVPixelBufferCGImageCompatibilityKey: kCFBooleanTrue,
        kCVPixelBufferCGBitmapContextCompatibilityKey: kCFBooleanTrue\] as CFDictionary

       let width = Int(self.size.width)
       let height = Int(self.size.height)

CVPixelBufferCreate(kCFAllocatorDefault, width, height, kCVPixelFormatType\_OneComponent8, attr, &pixelBuffer)
       CVPixelBufferLockBaseAddress(pixelBuffer!, CVPixelBufferLockFlags(rawValue:0))

let colorspace = CGColorSpaceCreateDeviceGray()
       let bitmapContext = CGContext(data: CVPixelBufferGetBaseAddress(pixelBuffer!), width: width, height: height, bitsPerComponent: 8, bytesPerRow: CVPixelBufferGetBytesPerRow(pixelBuffer!), space: colorspace, bitmapInfo: 0)!

guard let cg = self.cgImage else {
           return nil
       }

bitmapContext.draw(cg, in: CGRect(x: 0, y: 0, width: width, height: height))

return pixelBuffer
    }
}
All Set
So we managed to use CoreML and PencilKit framework together to determine the sketches drawn using the MNIST dataset. Machine learning on device has plenty of use cases and inferring the drawings is just one of them. You can find the full source code of this section in my Github Repository.
PencilKit Meets MapKit
Next up, let’s see how to draw on Maps using PencilKit, display enclosed Map images from the drawing area in Action Sheets, save the images in the Photos Library.
Quick Recap of MapKit
The MapKit framework is used to embed maps in our views and windows. We can do tons of stuff with the MapKit framework, like adding annotations and polylines, marking destinations and points of interest, etc.
MKMapView is used to display and embed maps in our applications.
End Product
Here’s what we’ll achieve by the end of this article:

It’s time to deep dive into the implementation!
Maps Under Pencil
Start by launching a new Single View Application in your Xcode.
Our first step will be to put our MKMapView under the PKCanvasView, so that we can draw over it!
Setting the MKMapView
It’s easy! You just need to import MapKit and add MKMapView in your View Controller. The following code does it without a storyboard.
var mapView = MKMapView(frame: CGRect(x: 0, y: 60, width:
view.frame.size.width, height: view.frame.size.height - 60))

self.view.addSubview(mapView)
Setting the PKCanvasView
let canvasView = PKCanvasView(frame: .zero)
canvasView.translatesAutoresizingMaskIntoConstraints = false
canvasView.isOpaque = false
view.addSubview(canvasView)

canvasView.backgroundColor = .clear

NSLayoutConstraint.activate([
canvasView.topAnchor.constraint(equalTo: self.view.safeAreaLayoutGuide.topAnchor, constant: 40),
canvasView.bottomAnchor.constraint(equalTo: view.bottomAnchor),
canvasView.leadingAnchor.constraint(equalTo: view.leadingAnchor),
canvasView.trailingAnchor.constraint(equalTo: view.trailingAnchor),
])
We’ve set the background color of the Canvas to transparent so that the Map underneath it is visible.
Setting the PKToolPicker
The following code adds the PencilKit ToolPicker for you.
override func viewDidAppear(_ animated: Bool) {
    super.viewDidAppear(animated)
guard
     let window = view.window,
     let toolPicker = PKToolPicker.shared(for: window) else {return}
toolPicker.setVisible(true, forFirstResponder: canvasView)
    toolPicker.addObserver(canvasView)
    canvasView.becomeFirstResponder()
}
Dragging the Map when it’s beneath the Canvas isn’t a tricky scenario. All we need to do is allow passing touches from the CanvasView to the views underneath.
So we’ll keep a toggle button which allows alternating dragging and drawing. In the first case, we pass the touches from the CanvasView and in the second case, we don’t!
We override the point function present inside the PKCanvasView class in the extension below:
extension PKCanvasView{
    override open func point(inside point: CGPoint, with event: UIEvent?) -> Bool {
        return DragOrDraw.disableDrawing
    }
}

class DragOrDraw{
    static var disableDrawing = true
}
disableDrawing is a boolean flag that can toggle map dragging and pencil drawing from the NavigationBar because both can’t coexist at the same time.
Setting up navigationBar
var toggleDrawItem : UIBarButtonItem!

var disableDraw : Bool = false

func setNavigationBar() {
let previewItem = UIBarButtonItem(title: "Preview", style: .done, target: self, action: #selector(preview))

let clearItem = UIBarButtonItem(title: "Clear", style: .plain, target: self, action: #selector(clear))
toggleDrawItem = UIBarButtonItem(title: "Drag", style: .plain, target: self, action: #selector(dragDrawToggler))
let navigationItem = UINavigationItem(title: "")
navigationItem.rightBarButtonItems = [clearItem,previewItem]
navigationItem.leftBarButtonItem = toggleDrawItem
navigationBar = UINavigationBar(frame: .zero)
navigationBar?.isTranslucent = false

navigationBar!.setItems([navigationItem], animated: false)
navigationBar!.translatesAutoresizingMaskIntoConstraints = false
view.addSubview(navigationBar!)
navigationBar!.backgroundColor = .clear
NSLayoutConstraint.activate([
navigationBar!.topAnchor.constraint(equalTo: self.view.safeAreaLayoutGuide.topAnchor),
navigationBar!.heightAnchor.constraint(equalToConstant: 60),
navigationBar!.leadingAnchor.constraint(equalTo: view.leadingAnchor),
navigationBar!.trailingAnchor.constraint(equalTo: view.trailingAnchor),
])
}
Now that the UI components are section, it’s time to convert the PencilKit drawings to Map Images.
Convert PencilKit Drawings to Map Images
In order to get the Map image from the drawn area, we need to get the bounds of the drawing and clip the MapView enclosed in that rectangle:
@objc func preview() {
	let bounds = canvasView.drawing.bounds
	if let image = clippedImageForRect(clipRect: bounds, inView: mapView!){
	    showPreviewImage(image: image)
	}
}
Here’s the implementation of the functionclipImageForRect where we’ll pass the PencilKit bounds and Map instance:
func clippedImageForRect(clipRect: CGRect, inView view: UIView) -> UIImage? {
        UIGraphicsBeginImageContextWithOptions(clipRect.size, true, UIScreen.main.scale)
        if let ctx = UIGraphicsGetCurrentContext(){
            ctx.translateBy(x: -clipRect.origin.x, y: -clipRect.origin.y);
            view.layer.render(in: ctx)
            let img = UIGraphicsGetImageFromCurrentImageContext()
            UIGraphicsEndImageContext()
            return img
        }

        return nil
}
Now that we have the image, we can show it in an UIAlertController with an option to add it to Photos Library:
func showPreviewImage(image: UIImage)
{
    let alert = UIAlertController(title: "Preview", message: "", preferredStyle: .actionSheet)
    alert.addPreviewImage(image: image)

	alert.addAction(UIAlertAction(title: "Add To Photos", style: .default){
        action in
        UIImageWriteToSavedPhotosAlbum(image, self, nil, nil)
    })
    alert.addAction(UIAlertAction(title: "Cancel", style: .destructive, handler: nil))

    present(alert,animated: true,completion: nil)
}
Note: Don’t forget to set the Privacy Usage Permission for the Photos Library in the info.plist.
For iPadOS, you need to use popoverPresentationController to display action sheets as shown in the below snippet.
if let popoverPresentationController = actionSheet.popoverPresentationController {
popoverPresentationController.sourceView = self.view
popoverPresentationController.sourceRect = CGRect(x: self.view.bounds.midX, y: self.view.bounds.midY, width: 0, height: 0)
popoverPresentationController.permittedArrowDirections = []
}
The addPreviewImage is where we embed the image in the content view of the Alert Controller by using another ViewController.
extension UIAlertController {
    func addPreviewImage(image: UIImage) {
        let vc = PreviewVC(image: image)
        setValue(vc, forKey: "contentViewController")
    }
}
The code for the PreviewVC is available with the full source code in the next section.
All Set
So that concludes our date with MapKit and PencilKit. The above example is handy when you need to share a part of your map with someone without taking screenshots. The source code is available in my Github Repository.
That’s a wrap up for PencilKit.