SwiftUI NavigationLinks and the Common Pitfalls Faced
Currently, it’s not lazy and that could be dangerous
Every application requires navigation unless, of course, you’ve made a killer app that’s doing great with a single view only.
NavigationView is one of the main players responsible for navigating through different views (the other one being TabView).
NavigationView in SwiftUI is analogous to UINavigationController in UIKit, and NavigationLinks are like segues (in fact, much better than that).
A NavigationLink is responsible for taking the user to the view specified in destination as shown below:
NavigationLink(destination: Text("New Screen")) {
Text("Press me")
}
The body of a NavigationLink is the view which, when pressed, takes the user to the destination view.
For a NavigationLink to work, it needs to be a part of NavigationView, although not explicitly.
Our Goal
- Understanding the different ways in which navigation works.
- Handling
NavigationLinkwhich masks the views inside it. - Tackling
NavigationLinkdestinations that don’t load lazily.
A Bit of History
Navigation links have already seen a lot of changes and deprecations from the time SwiftUI was released.
Things like DynamicNavigationDestinationLink, NavigationDestinationLink, and NavigationButton are deprecated and their functionality is now included in NavigationLink (at the time of writing).
NavigationLink Programmatically
Often, there’s a need to trigger a navigation link based on certain asynchronous events or conditions. For such scenarios, we can set up the navigation link to be triggered programmatically like this:
NavigationView{

    VStack{
        NavigationLink(destination: Text("New Screen"),isActive: self.$isActive) {
            Text("")
        }

        Button("Press programmatically"){
            self.isActive = true
        }
    }
}
In the above code, the NavigationLink is defined with isActive, set to false initially.
Once the button is pressed, the state property is set to true, causing the body of the SwiftUI view to be rendered again, thereby triggering the NavigationLink which is now active.
Routing NavigationLink With Tag
In cases where there are multiple navigation links, routing to the navigation link with the above-mentioned approach would require too many state variables.
Thankfully, NavigationLink provides another implementation by using tags as shown below:
@State var selection : Int? = nil

var body: some View {
    NavigationView{

        VStack{

            NavigationLink(destination: Text("New Screen"), tag: 1, selection: self.$selection) {
                Text("")
            }

            NavigationLink(destination: Text("New Screen 2"), tag: 2, selection: self.$selection) {
                Text("")
            }

            Button("Button 1"){
                self.selection = 1
            }

            Button("Button 2"){
                self.selection = 2
            }

        }
    }

}
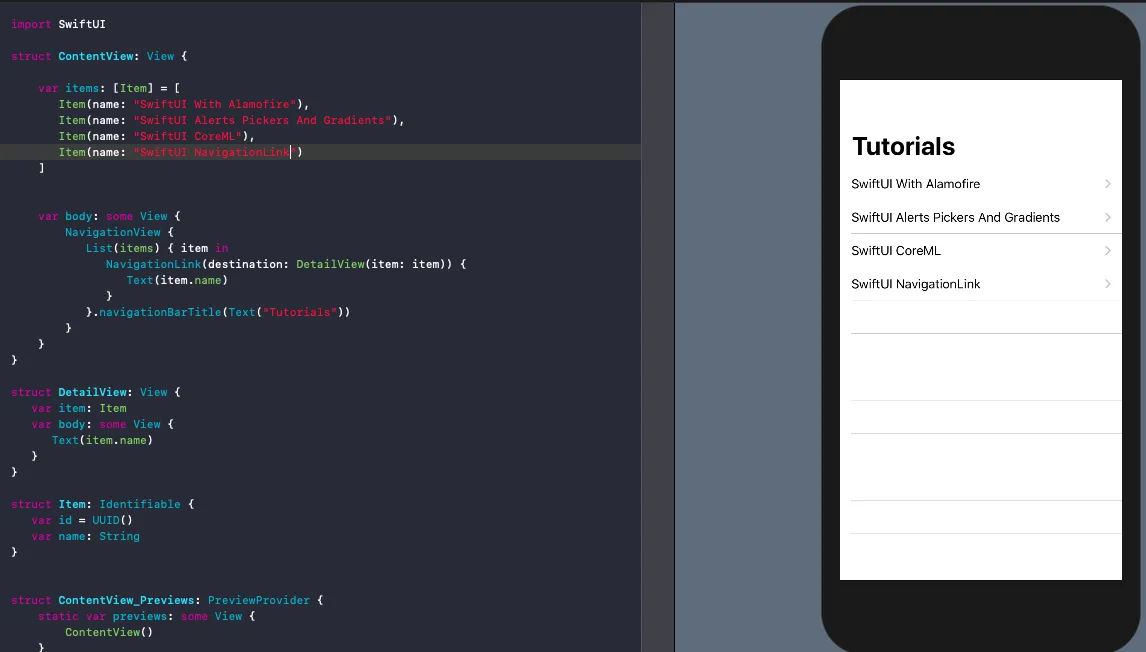
NavigationLink With Lists
When a NavigationLink is embedded in a SwiftUI list, the arrow accessory is automatically placed in the row items as shown below:
NavigationLink, despite seeming easy on the eyes, can easily get out of hand if not handled correctly.
Now that we’ve discussed the different ways of setting up NavigationLinks, it’s time to address the common pitfalls that you’ll face while integrating this component into your SwiftUI applications.
Pitfall 1. NavigationLink Masks Views Under ScrollView
Let’s look at the example below which tries to display an image in a ScrollView with each image embedded in the NavigationLink:
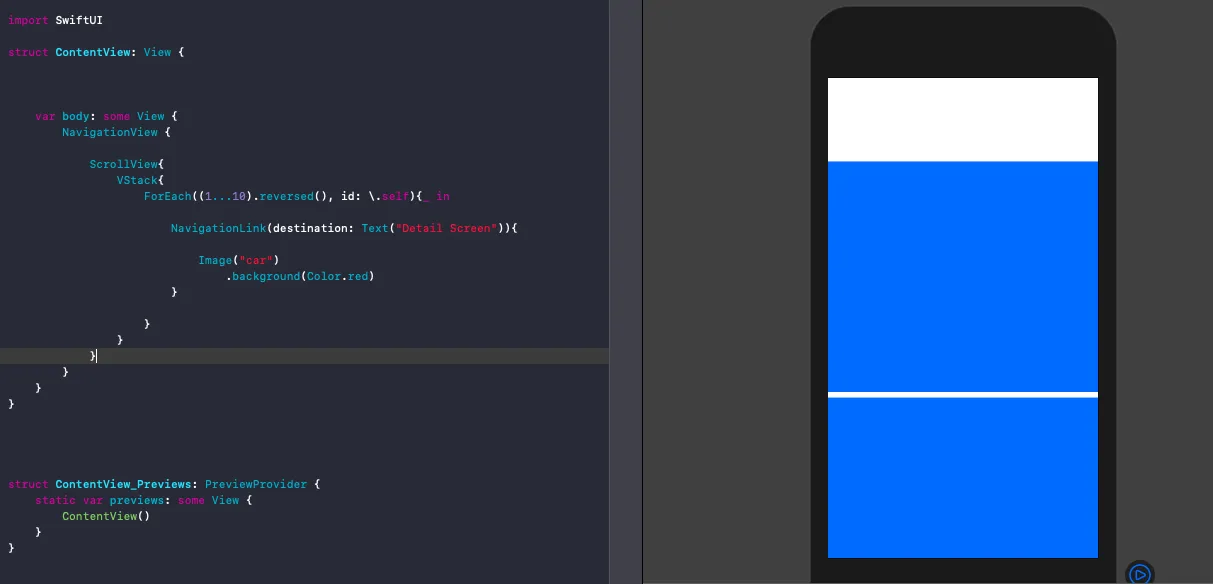
The image is not visible, at all. Instead, we see the view getting overlayed by the accent color (system blue, in this case).
To remove this overlay, simply set the buttonStyle property on the NavigationLink to plain as shown below:
NavigationLink(destination: Text("Detail Screen")){
Image("car")
.background(Color.red)
}.buttonStyle(PlainButtonStyle())

In another scenario, where we’re using a PickerView instead of Lists inside a NavigationView, setting the buttonStyle as plain would lead to masking of the images as demonstrated in this piece.
Hence in those cases, it’s important that you set the Image rendering mode to original.
Pitfall 2. NavigationLink Destination Is Not Lazy
Update: As of Xcode 11.4.1, iOS 13.4.1, Apple has fixed this issue. NavigationLink Destination Views are now loaded lazily. Feel free to read up this section for historical purposes.
This means the destination views are loaded immediately even when the user hasn’t navigated to that view. To cross-check this, simply add a print statement in the onAppear of the destination view.
Destination views not being lazy can impact the performance of applications that have a list of views. When there are hundreds of rows in a list, each having a destination view that fetches remote data, the performance of the application would certainly take a hit.
Thankfully, there’s a workaround for this, as showcased in this Tweet by Chris. By wrapping the destination view in a custom view of our own, we can load the NavigationLink’s destination lazily, as shown below:
struct LazyView<Content: View>: View {
    let build: () -> Content
    init(_ build: @autoclosure @escaping () -> Content) {
        self.build = build
    }
    var body: Content {
        build()
    }
}
And finally, we encapsulate the destination in the above view:
NavigationLink(destination: **LazyView**(Text("Detail Screen"))){

Image("car")
.background(Color.red)

}.buttonStyle(PlainButtonStyle())
This certainly boosts the performance of the application.
Conclusion
We explored the different ways of setting up a NavigationLink in SwiftUI and addressed the two common pitfalls. It can be argued that NavigationLink destinations are not lazy by default (at the time of writing).
Perhaps, by design, Apple doesn’t want views in SwiftUI to be heavy as reloading of the views should be a cheap operation.